Introduction
Uninterruptible power supplies are very useful when the power goes out. I’ve refrained from purchasing one as they aren’t cheap for the load that I’d need to cover and the electrical grid in my area is quite reliable. I can count on my fingers the number of times I had a serious blackout. If you asked me a year ago if I’d buy a UPS for my setup, I’d tell you no, but just under a year ago, I experienced a pretty big power outage. The lights flickered and that was enough to stop all of my servers. Since the machines were set to restart upon power being restored, they restarted immediately. The power kept flickering so I opted to shut down the servers until I knew I’d have a reliable power source. This was also the moment that I realized, a UPS might be a worthwhile investment.
Picking a UPS
I did some research online and found that it was recommended to purchase a cheap old UPS and to replace the batteries. I looked around Kijiji and eBay, but everyone listed their UPS’ at such a steep price, that it would make more sense to purchase a new one. So, when I saw that Costco had a sale on the APC Back-UPS Pro 1500, I decided to purchase one. It’s ratings weren’t the best, but I felt reassured with Costco’s return policy.

Installing NUT on Unraid
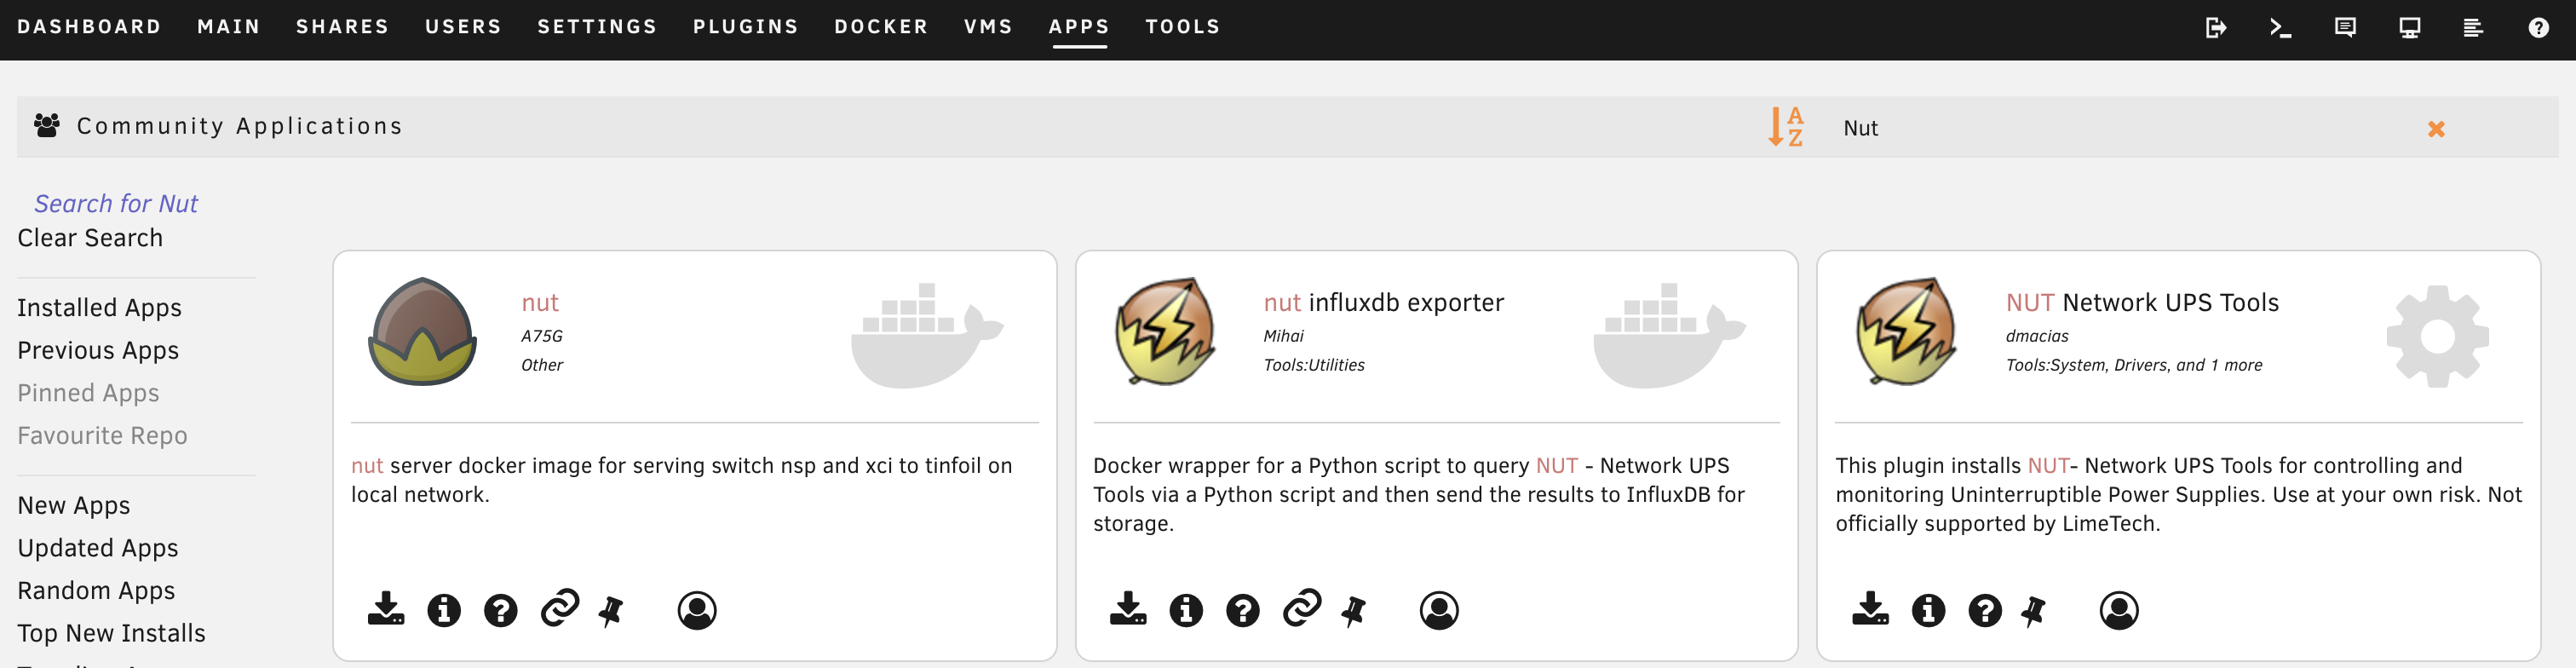
A perfect device to act as the netserver would’ve been a Raspberry Pi. I looked around for a Pi Zero 2 W, but unfortunately they were out of stock everywhere. I decided that I would follow Mtherboard’s guide to have Unraid as my netserver. I transfered all of my servers to the UPS and plugged the USB connection into the back of my Unraid server. I went into the APPS and installed NUT Network UPS Tools.
I then went into SETTINGS and NUT Settings.

At the bottom left, I clicked AUTODETECT.

After the scan was done, I started to configure my settings. I set the following settings:
UPS Mode: Netserver
UPS Monitor Password: newmonitorpassword
UPS Slave Password: newslavepassword
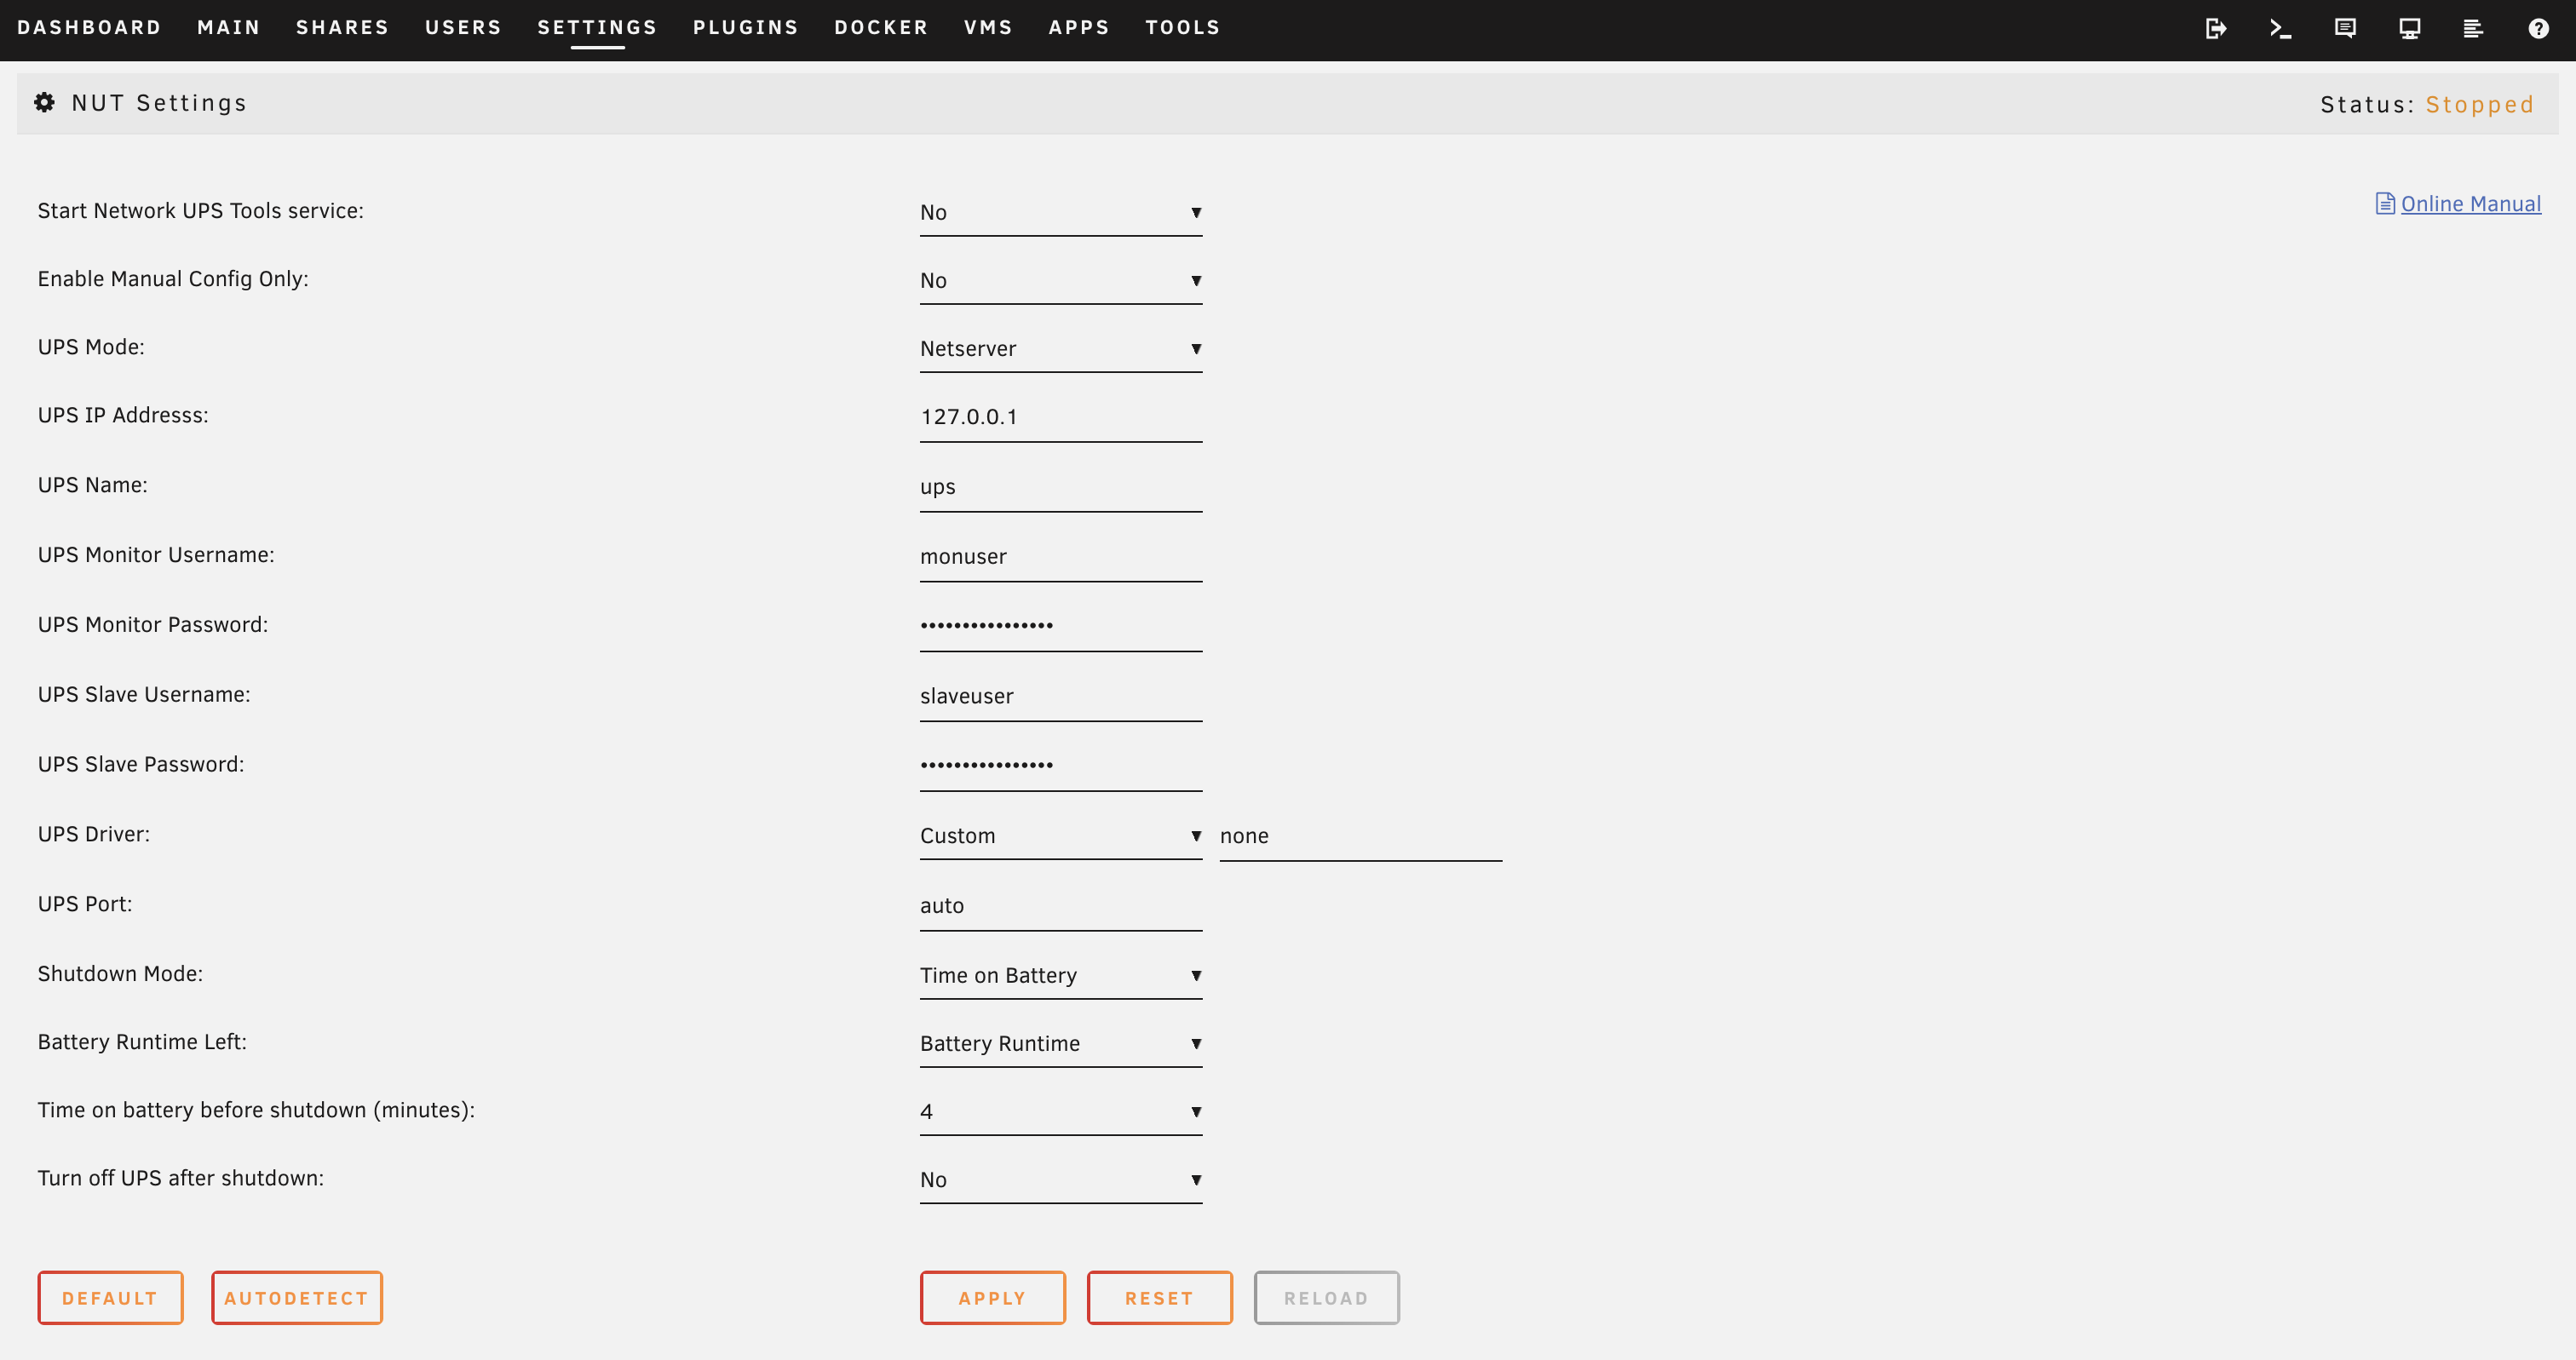
The shutdown mode and time were already fine with me, so I left them as default. I clicked Apply and then changed the Start Network UPS Tools service: to Yes. I then applied those settings as well.

NUT Client on Ubuntu Server
I had mutliple Ubuntu machines that I needed to configure as NUT clients. On each client I did the following commands:
sudo apt install nut-client
cd /etc/nut
sudo nano nut.conf
At the bottom of the nut.conf file, I changed the line to MODE=netclient. I saved and closed that file. I then moved onto the next file.
sudo nano upsmon.conf
I scrolled down to the below image.
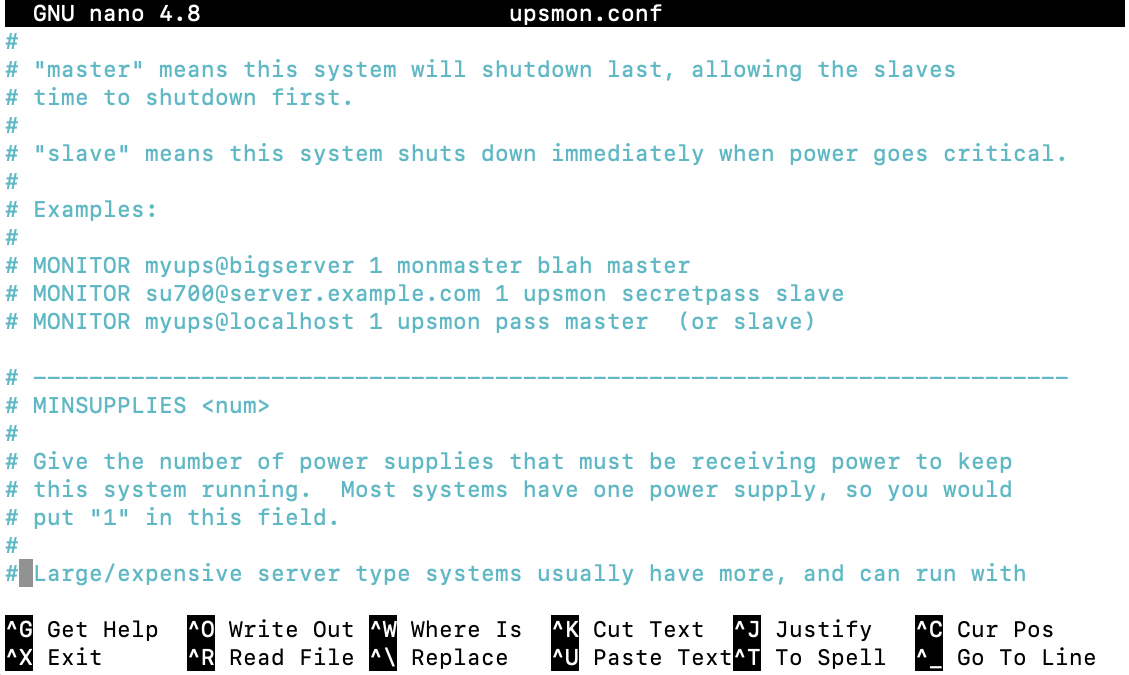
In the gap where there was no pound signs, I put in the details of my netserver and the slave credentials.
MONITOR <ups_name>@<NUT_server_IP> 1 <slave_username> <slave_password> slave
An example would be:
MONITOR ups@192.168.1.6 1 slaveuser newslavepassword slave
I then saved the file and ran the following command:
sudo systemctl restart nut-client
After doing this on all my Ubuntu machines, it was time to move onto my pfSense box.
NUT Client on pfSense
In pfSense, under System > Package Manager > Available Packages I searched for the nut package. I clicked + Install and waited until it finished.

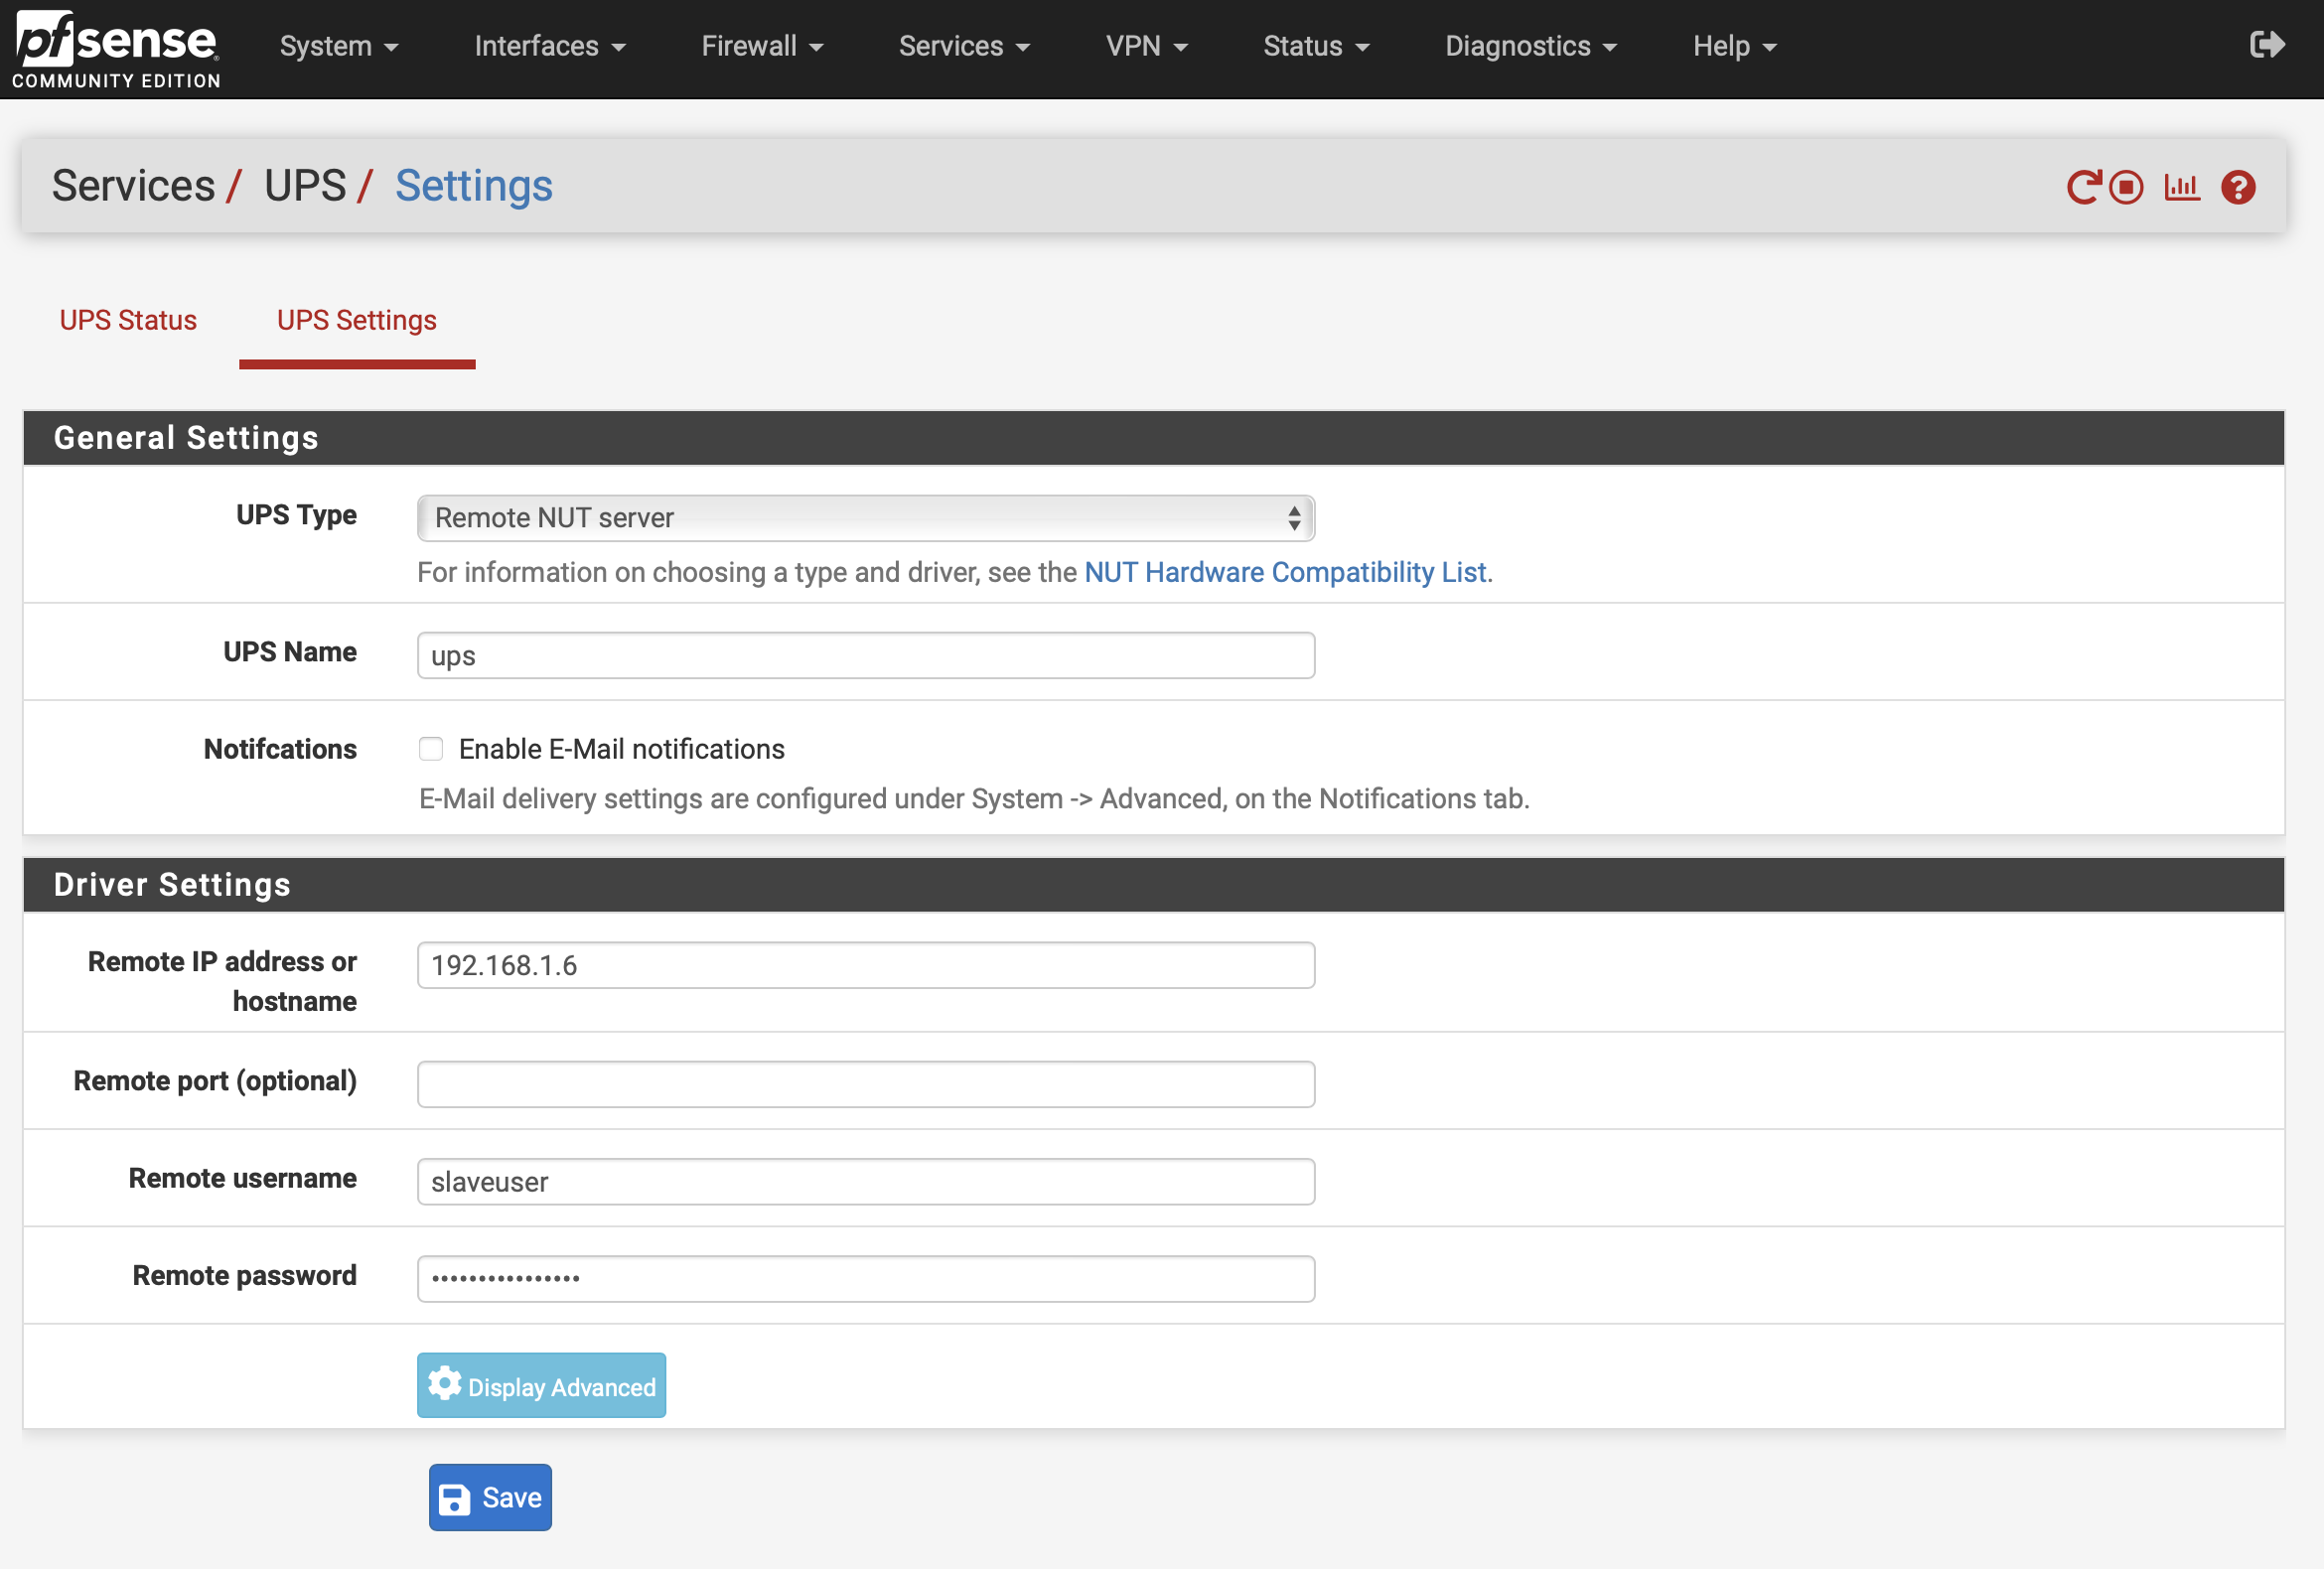
I then went to Services > UPS > UPS Settings and changed the following settings:
UPS Type: Remote NUT server
UPS Name: ups
IP address or hostname: 192.168.1.6
Remote username: slaveuser
Remote password: newslavepassword
I then saved my settings and moved onto ESXi.
NUT Client on ESXi 6.7
I downloaded the first file from this blog 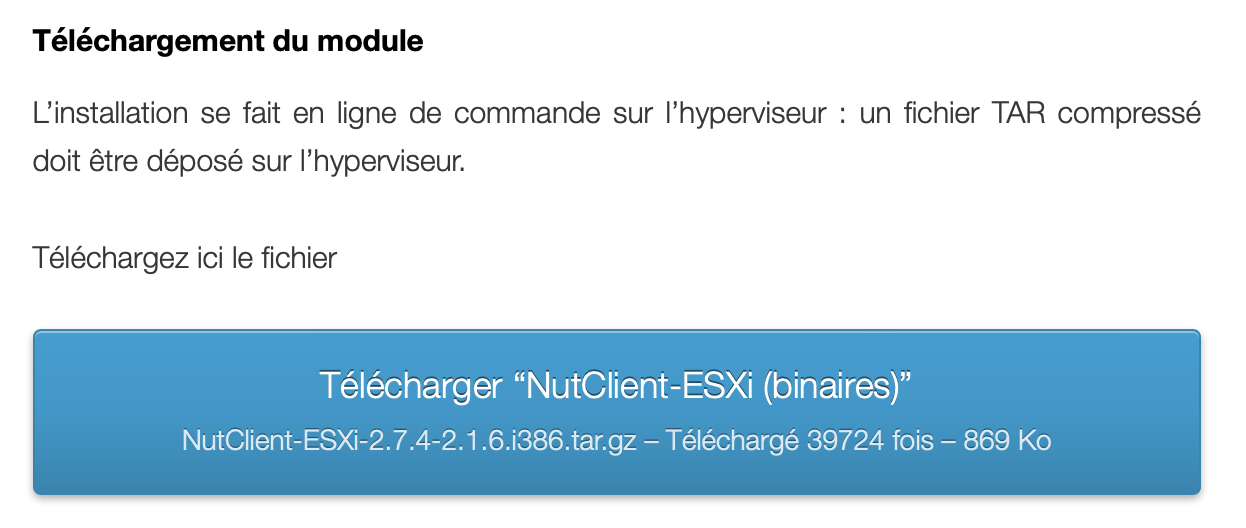
I extracted the files and uploaded all of them into my SSD datastore on ESXi. I then enabled SSH and proceeded to SSH in as root. I ran the following command so the install would be permitted:
esxcli software acceptance set --level=CommunitySupported
I then moved all of my files to the /tmp/ directory.
mv /vmfs/volumes/SSD/readme.txt /tmp/
mv /vmfs/volumes/SSD/upsmon-2.7.4-2.1.6.i386.vib /tmp/
mv /vmfs/volumes/SSD/upsmon-install.sh /tmp/
mv /vmfs/volumes/SSD/upsmon-remove.sh /tmp/
mv /vmfs/volumes/SSD/upsmon-update.sh /tmp/
I proceeded with the install instructions with the following commands:
cd /tmp
chmod +x upsmon-install.sh
./upsmon-install.sh
After the install finished, I removed the files.
rm readme.txt
rm upsmon-2.7.4-2.1.6.i386.vib
rm upsmon-install.sh
rm upsmon-remove.sh
rm upsmon-update.sh
I then rebooted the ESXi server.
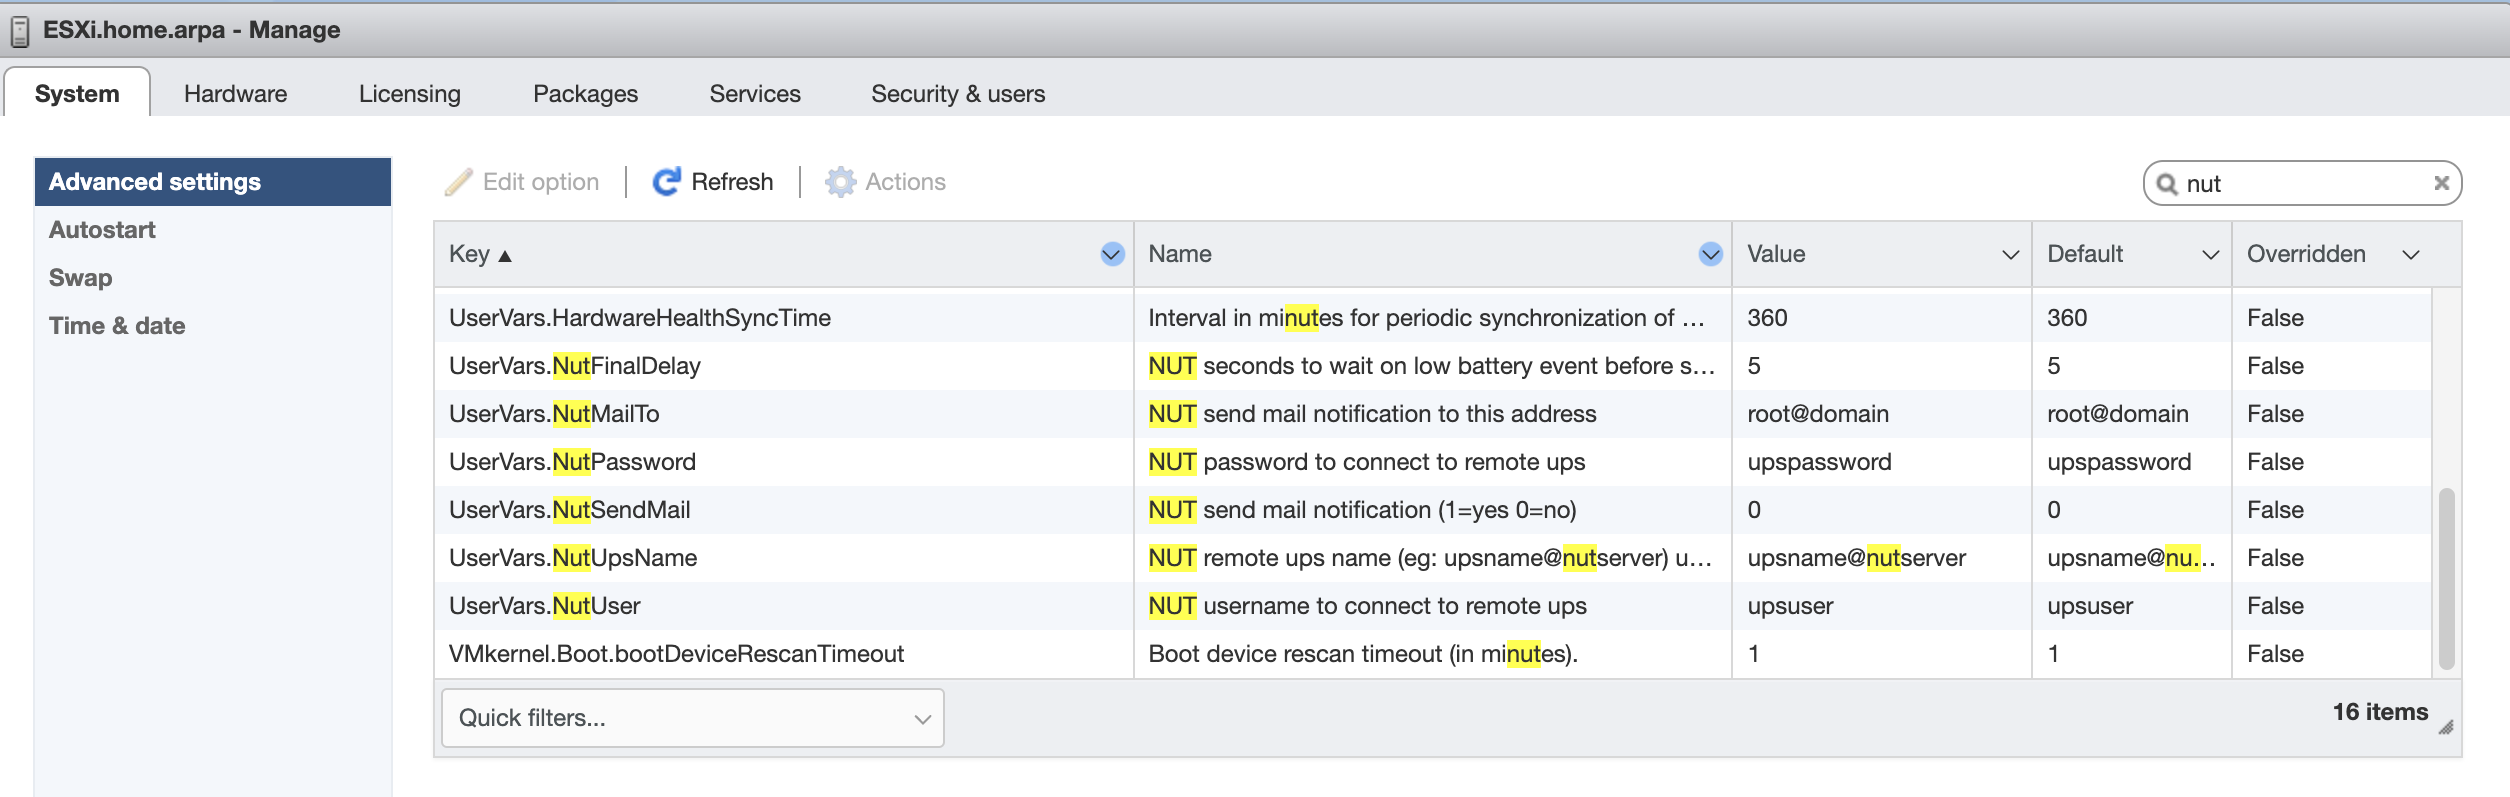
Inside the GUI, I went to Manage > System > Advanced settings and looked for the NUT settings. I inputted the slave username, password, ups name, and changed the final delay to 60 seconds.
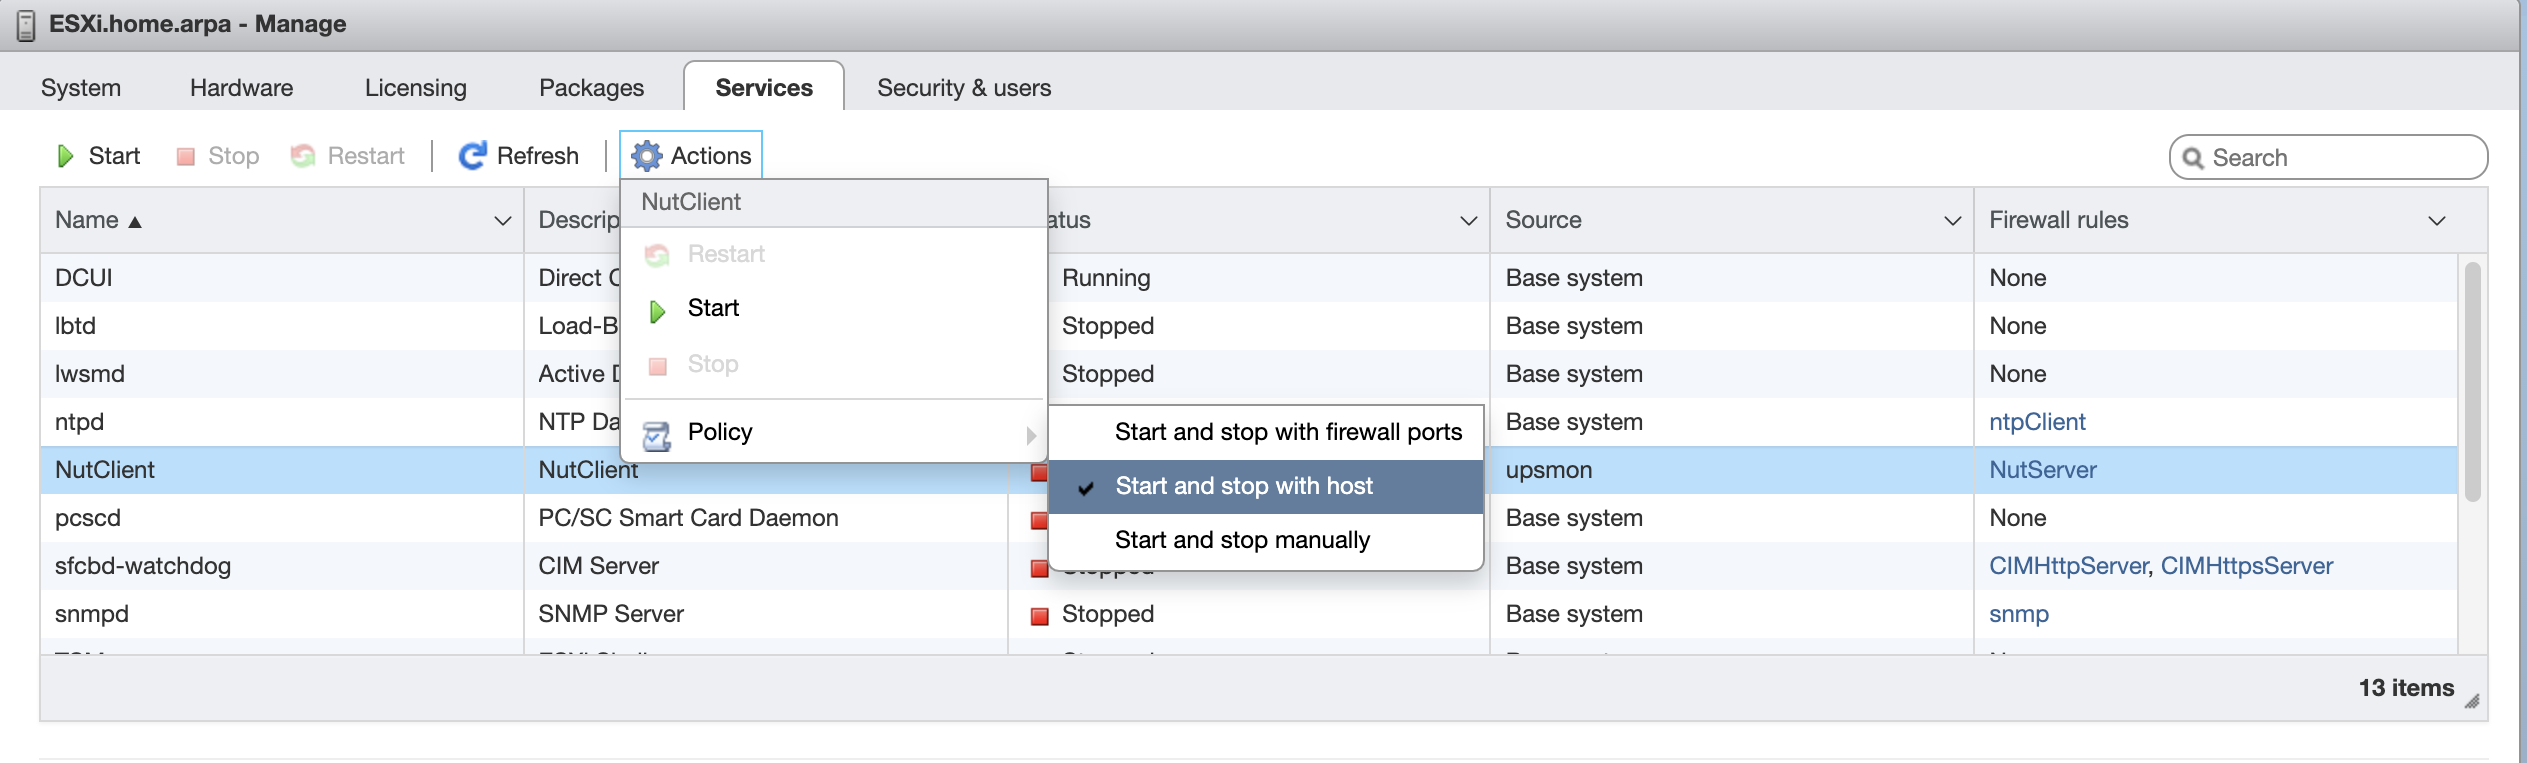
I then went into Manage > Services > Actions and changed the NutClient policy to Start and stop with host.
I rebooted the server again, and it was then time to test out the automatic shutdown.
Testing the NUT
I went into my Unraid terminal and put in the follwing command to initiate a shutdown without affecting the UPS:
upsmon -c fsd
The shutdown was successful and everything turned off. I then rebooted everything to do the live test.
I unplugged the UPS from the wall and let it run on battery. After 4 minutes, Unraid sent the shutdown command to all the clients as it was supposed to. Everything shutdown as planned just like in the other test scenario.
Conclusion
This went process went very smoothly with Mtherboard’s guide and I don’t think I would’ve even attempted it without the guide. I noticed that my load on the UPS was around 100W, so the decommissioning of both my R720s really helped reduce power usage, especially since one of them would already go over that. I noticed that the UPS would estimate 50 minutes of power, but it would quickly start dropping once it was actually on battery. I would recommend anyone to purchase a UPS that is compatiable with NUT to set up for their systems as it’s easy to set up and can save a lot of stress when the power does go out.