Introduction
My Voxelab Aquilla out of the box functioned well for quite a few days. After a while, I noticed that the tube connecting my extruder to my hot end would disconnect and cause a print to fail. I couldn’t find a clip in the packaging for the printer, so I decided to upgrade my tubing along with the bed springs and extruder.
Upgrading Components
I decided to buy this kit from Amazon as it included the components I needed and was priced at $24.99 with an additional $2 coupon.
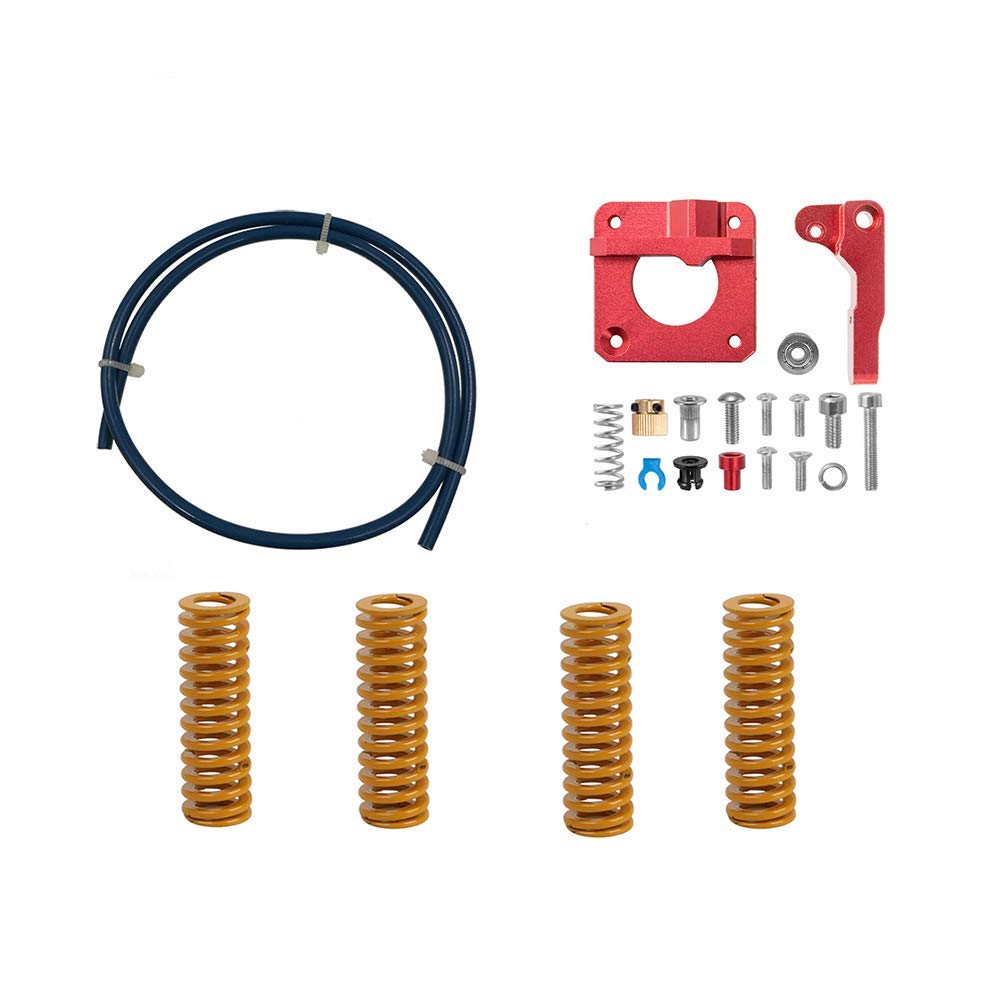
Fortunately, the Voxelab Aquilla is very similar to the Ender 3 V2 and many of the tutorials are almost exactly the same on the Aquilla. I followed this guide on how to upgrade the bed springs. I later realized that my z-axis switch was positioned to high and had to lower it. The extruder upgrade was pretty straightforward as well and I followed this guide from the same creator. The tubing, the main reason for this upgrade, was upgraded with this guide. After this I was able to level the printer and try a test print with my preferred settings (192 Celsius nozzle, 65 Celsius bed).
Conclusion
I printed a Benchy as my first print as the results seemed promising. There seemed to be almost no issues with the print. I was a bit concerned with how hard the filament was being pressed towards the gear, so I replaced the included spring with one of the old bed springs. My next print was my model city, which had some issues with warping and gaps between the brim. It was a pretty quick upgrade which added a nice bit of colour to the otherwise black printer.