Introduction
Having printed some toys and small objects with my 3D printer, I wanted to create something of my own. My 3D printer is the Voxelab Aquilla and I haven’t made any modifications to it yet. I print with my nozzle temperature at 190 Celsius as I found that 200 caused bubbling and my bed temperature at 65 Celsius. I slice my files via Parsec on another computer which has much more computing power than my main machine. I saw Luca Liguori’s Etsy creation on Reddit and was inspired to create some models of Toronto. Looking through the comments and through Google, I found a guide on printing cities and terrain.
Prusa Printers Guide
The guide had very detailed instructions and included screenshots. The city model required CADMAPPER and SketchUp, both of which I had no experience working with. Following the instructions, I was able to create an STL file of Union station and Queen’s Park. The STL files looked pretty decent and I proceeded to print Queen’s Park as it was the quicker of the two. The print was going well until around near the half-way point my print bed shifted. This was highly discouraging as the print already took a few hours and all looked well until then. I went back to the drawing board and looked at my Union station STL. The terrain near one of the buildings seemed to have gone over the buildings.

Being new at all of these programs, I wasn’t able to find a fix to this issue. I tried cutting out different sections of Toronto, but found that there would always be a minor issue, whether it be the terrain rising too high or turning buildings into thin slivers. Having tried this for a few hours, I decided to look for other methods to create an STL file for a city.
osm2blender
After browsing around some more, I found this guide on how to turn an exported OpenStreetMap file into a Blender render. I haven’t used OpenStreetMap or Blender before, but OpenStreetMap seemed to be pretty intuitive. A minor annoyance I found was that I wasn’t able to rotate before exporting to a file. Following the guide’s instructions was easy and I was able to create a model of my selected area. One major issue was that I had no idea how to use Blender. I thought about learning to use Blender, but I also noticed that the buildings weren’t very detailed and decided it wasn’t worth the hassle. This would move me to so far, my final option.
City of Toronto 3D Massing
As it turns out, the city of Toronto has very detailed models of the entire city. Going to this webpage with Firefox, I was able to download certain sections of the city. I downloaded the SketchUp files that included Union station and Queen’s Park. The files were massive and made any software they touched suffer. I opened the files in SketchUp and exported them as .obj files after removing unnecessary tags and adding rectangles around the bottom to create a base.

I then opened it into Cura and tried slicing the model. There were issues with the model and lots of the print was not being added to the final gcode file. Though some searching online, I tried using PrusaSlicer to fix my file.

Unfortunately, after exporting the model from PrusaSlicer and moving it into Cura produced the same result. I realized that only the buildings were being printed and that resulted in the model looking very bare. I also tried my hand at part of the suburbs. The suburb models were much larger in length and width compared to the core downtown models. In order to fit the model onto my 3D printer, I had to scale it down a lot. I sliced the file and then started printing.
The base took around 5 hours to print and then the houses began to be printed. I noticed an issue immediately once it tried to print the houses. It seemed that the houses from the file were way to small and my printer was incapable of printing at such a small size, well at least my nozzle was. I wanted to see how the print would turn out, but before it could move to the next layer, the filament got stuck and tied up in my extruder. I stopped my print and proceeded to remove the filament. I moved the printing head up so I could purge in the new filament I added. When I tried to continue printing, the printer resumed at the higher z level I had moved it to. I stopped the print and move the nozzle closer to the bed. This however, resulted in the nozzle being too low and caused it to start dig into the already printed base. At that point, I considered the print a failure and stopped the print completely.
I tried using Meshmixer to split the model into many pieces, but having failed multiple times, I didn’t feel very motivated to continue. I still wanted to print something of my own, so I went back to Toronto’s website and found that some areas had a SketchUp Simplified file.

These files were much smaller than the non-simplified counterparts and played much nicer with my software. I opened the file up in SketchUp and did the same that I did earlier. The resulting file was similar to the other but was much easier and quicker to work with. I scaled down the model to 5%, 7.5%, and 10%. Not wanting to print too print buildings that were too small I wanted to opt for either of the two larger models. I decided to try the 7.5% as it estimated around half the time as the 10% and if it failed, I would have used less filament and time. The beginning of the print went well just as last time, however, when the buildings began to be printed the filament tangled near the cold end again. That meant that that print was a loss cause as well. I thought that the printer might’ve been having issues printing even 7.5% scale, so I tried 10% scale next. This print went fine until the buildings as well, This time however, instead of the filament getting tangled up, the cold end began chewing on the filament and it reached a point where it wasn’t able to grip onto the filament and push it to the hot end. I ended the print and cleaned both the nozzle and the cold end’s gear as it had small pieces of filament in between its teeth.
I again tried printing the 10% scale map, I set the nozzle temperature to 192 Celsius and the bed temperature at 65 Celsius. To mitigate the chewing of filament, I set my print speed to 75%. This print went smoothly in the beginning as usual, after two layers of buildings the tube connecting my cold end to my hot end disconnected and caused filament to stop being extruded. This again has lead to me having to end the print. Believing that the tube disconnecting was a one off thing, I tried the print again with the same settings. Just like before, the tube disconnected from the cold end.
I decided to purchase some upgrades to try to solve the issue. I wrote more about them in this blog post. With the Benchy test print looking fine, I decided to try again with the 10% scale map at 75% print speed, 192 Celsius nozzle, and 65 Celsius bed temperature. This print was the worst out of all of them. The sides warped up and were not sticking to the bed. I did some research and looked for some glue, but since I didn’t have any, I decided to give the bed a thorough cleaning and try again.
This next attempt turned out to be the best one so far. It had the same settings as the previous except that the print speed was at 50%. I was beginning to see the buildings but when I came to check on it, the extruder gear had loosened and stopped feeding filament. I had to end the print and retightened the gear.
Conclusion
It took about a week, but I was eventually able to finish a print.
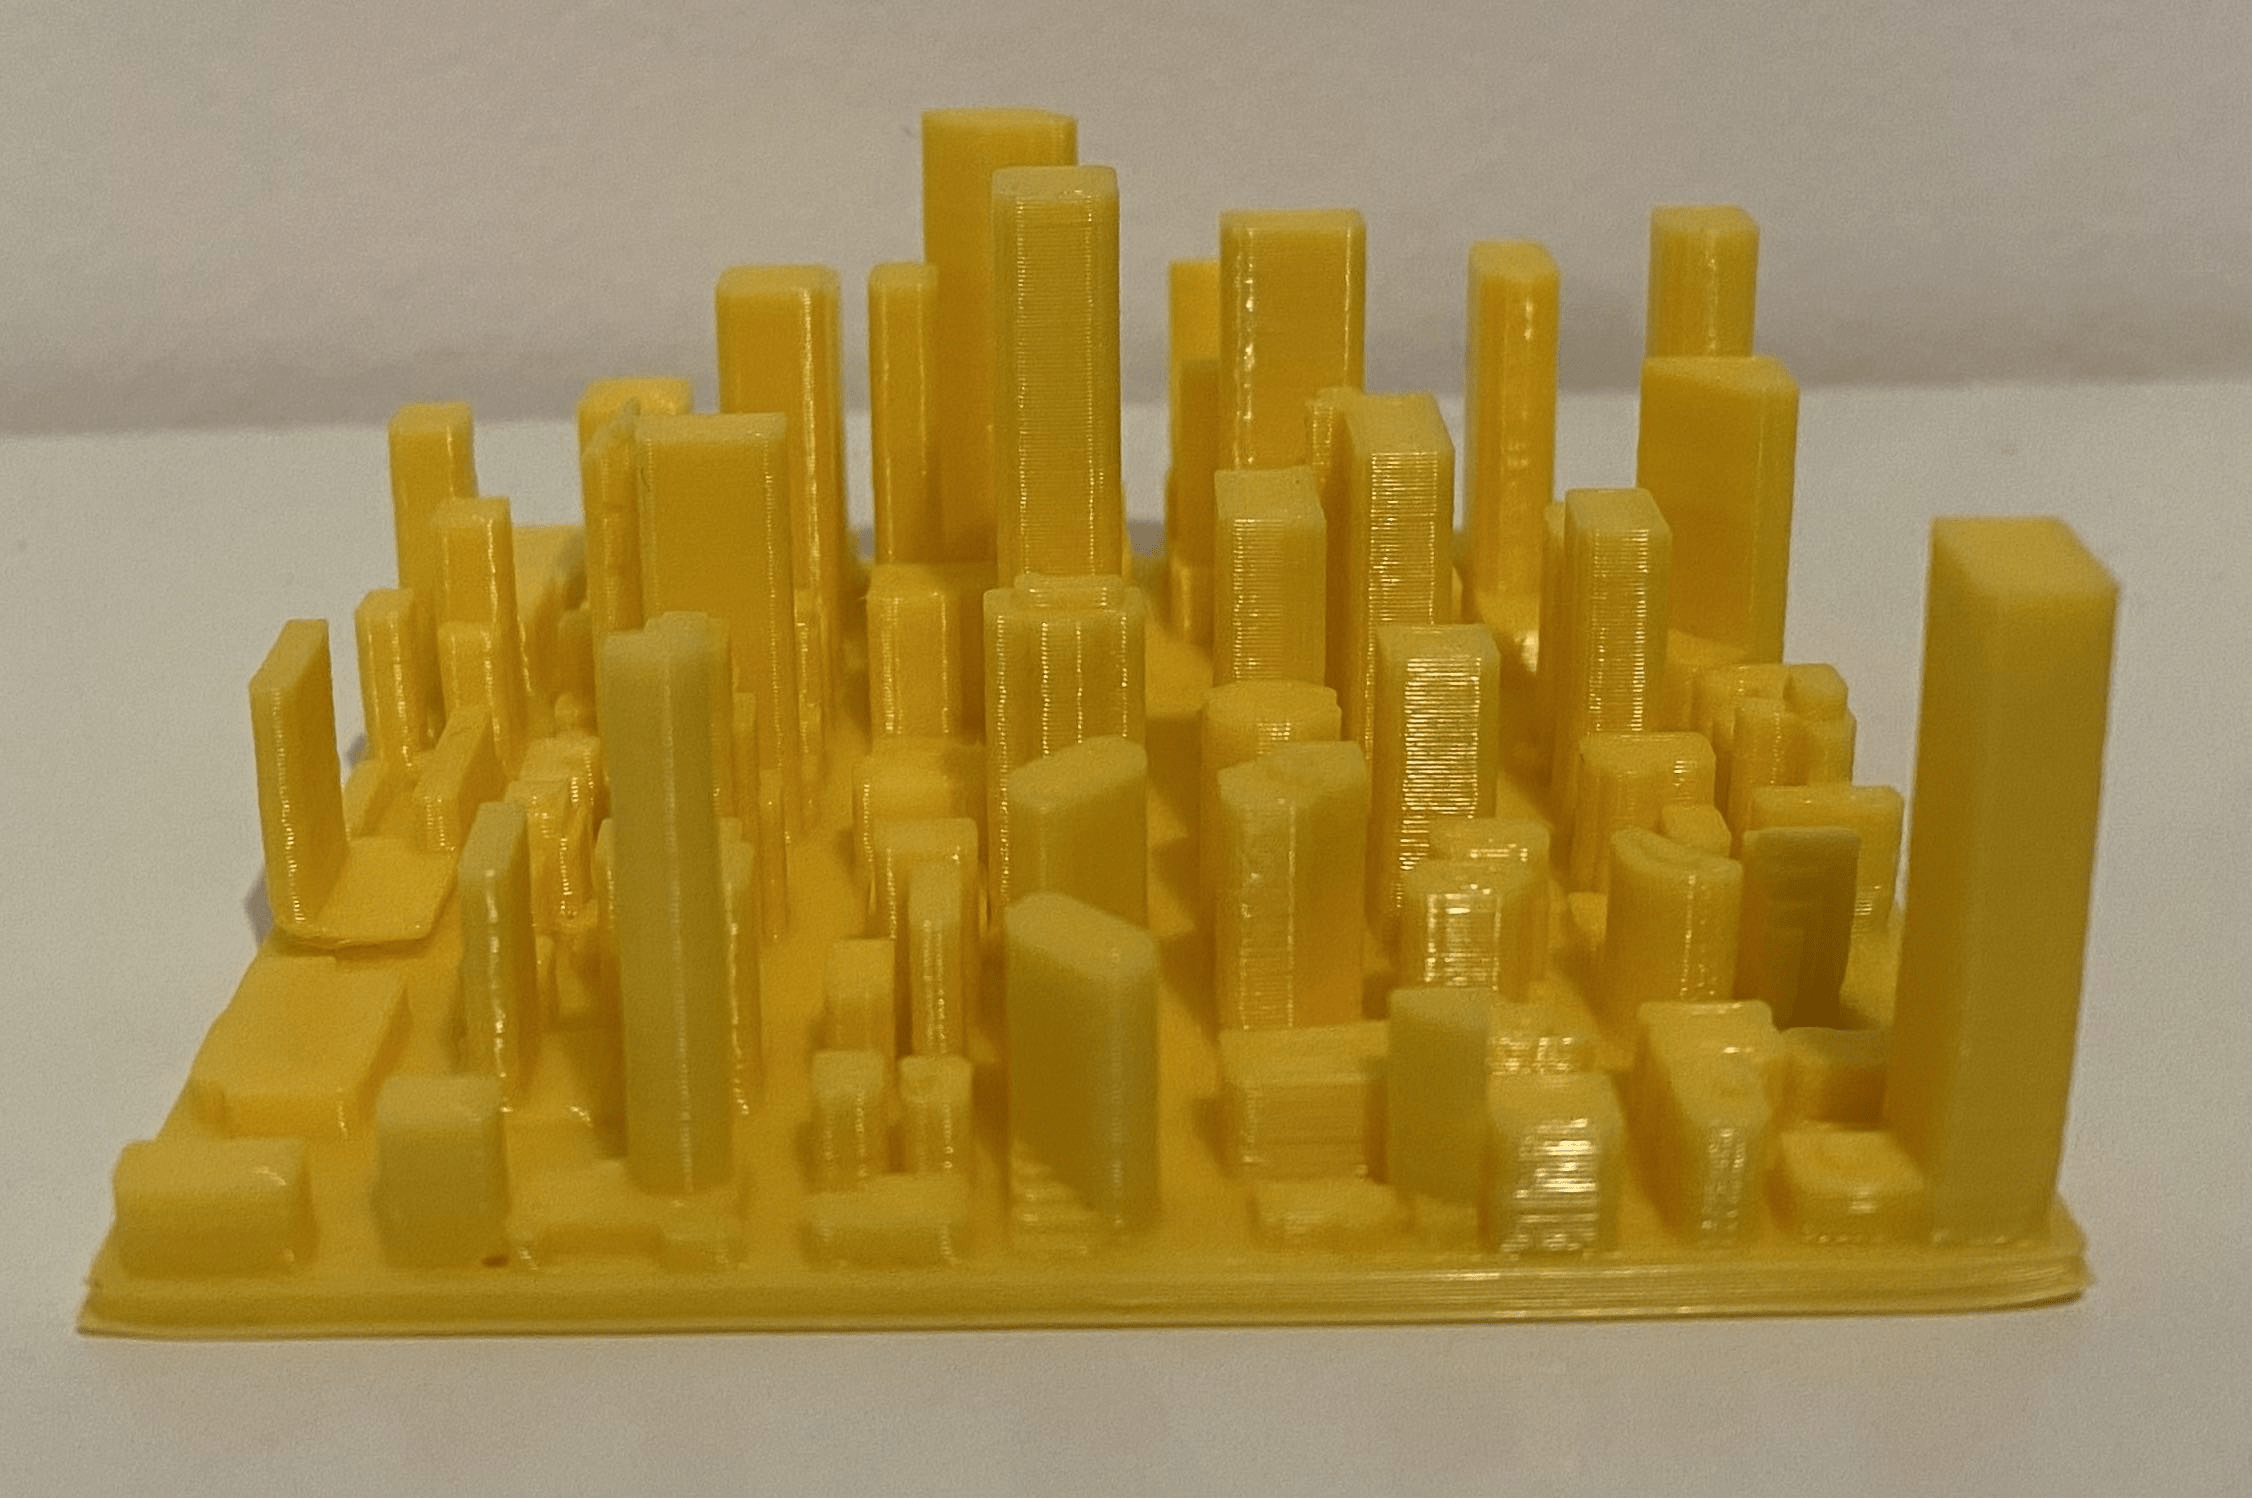
50G North 3 Simplified The edges are warped a little and the print could probably use a glue stick on the bed. I tried another print overnight with the same settings and the print shifted a lot along with lots of warping. I will continue to try other parts of Toronto while trying to solve the warping issue.