Introduction
The hot end fan on my Aquila has had a high pitched noise ever since I set it up. I am considering replacing the fan in the future, but for now I wanted to replace the fan shroud. I found this remix of a Satasana shroud for the Aquila on Thingiverse by TheSubaruJunkie. The shroud would not cover the fans like the original shroud did and had two ducts for part cooling.
Printing the Shroud
I tried printing the shroud with no supports with my Duramic PLA+ filament but found that it warped a lot. I recently bought the filament, but I’m not sure if that is the cause of the warping. I had my hot end at 205 Celsius and my bed at 50 Celsius like I did for my city model prints. I tried printing temperature towers, and it seemed like 205 Celsius was a good spot for the hot end but I still got warping. Not wanting to relevel my bed with the new temperature, I decided to take a break and try again another day.
I retried printing the shroud today with the same settings as last time except the cooling fan would be off until the 4th layer and I loosened my eccentric nuts. The print completed and still warped slightly. Luckily the warping didn’t seem to be too terrible.

Mounting the Shroud
I removed the stock Aquila fan shroud and used the screws on the replacement shroud.
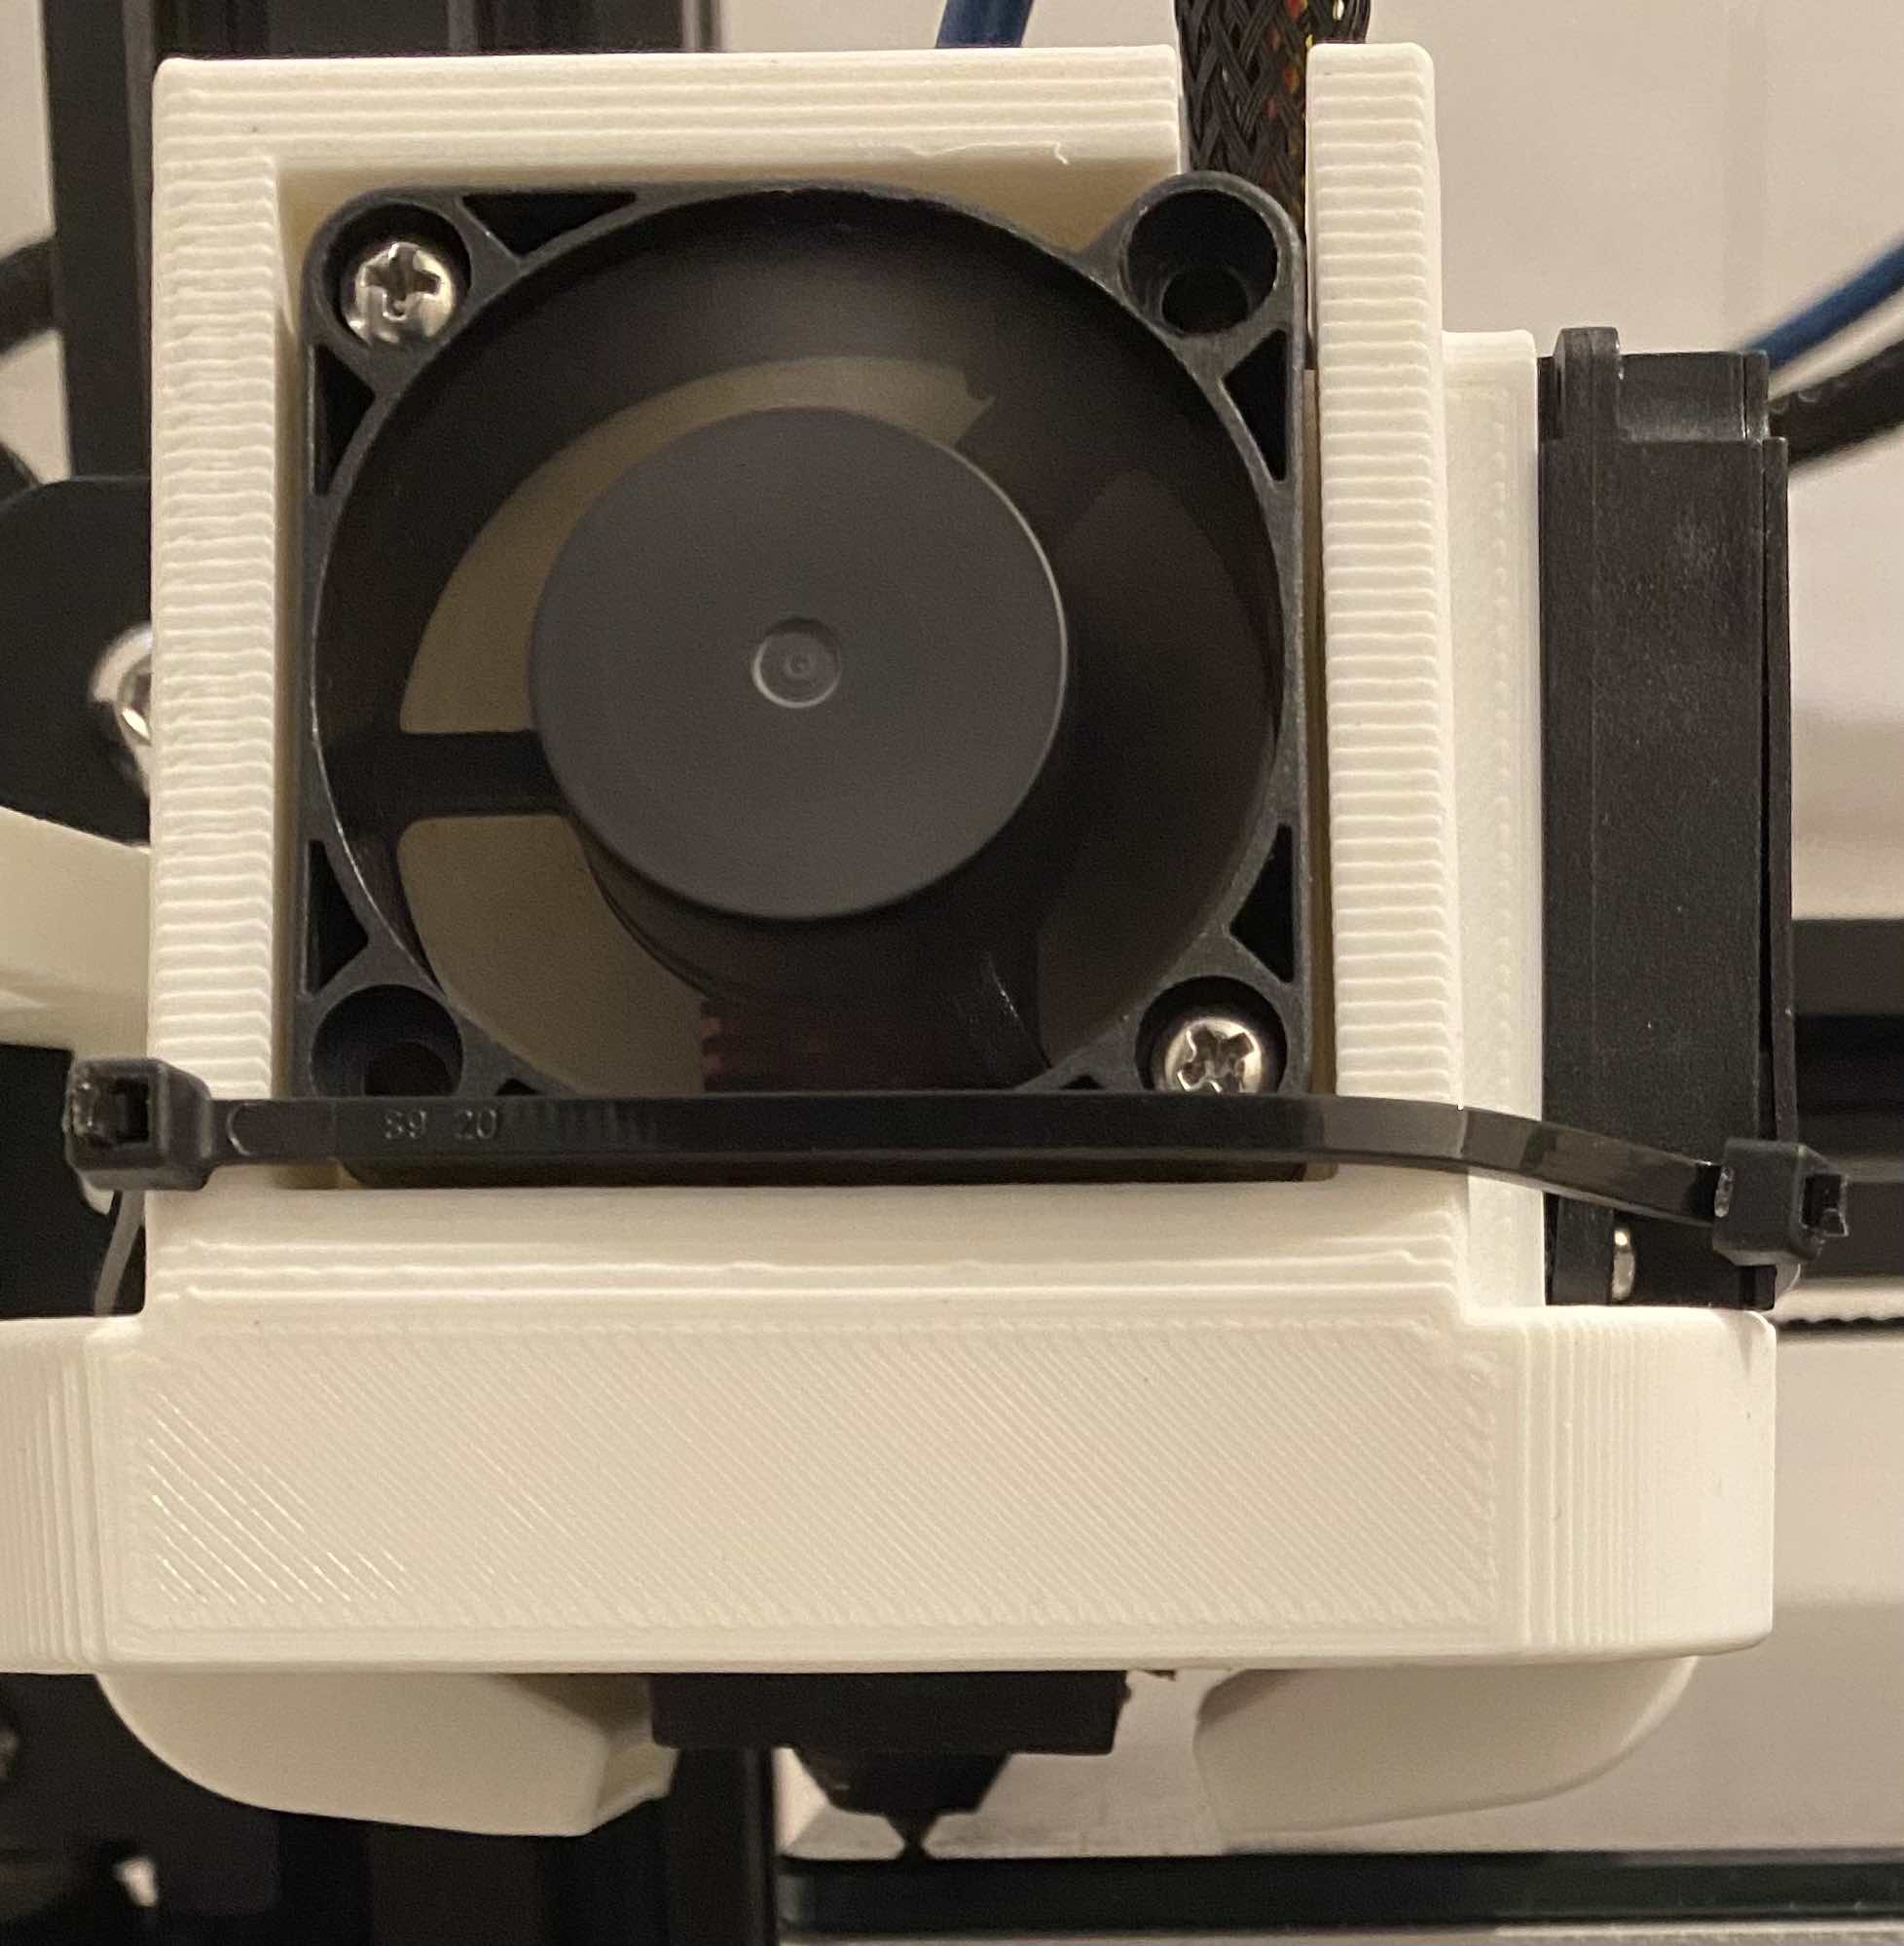
Unfortunately, the side of my blower fan popped off, so I put a zip tie to hold it in place.
Conclusion
The high pitched noise has disappeared after installing the shroud. The remaining power supply and main board fans are now the loudest part of the printer, and in the future I might end up replacing them. This was a nice upgrade as it didn’t require purchasing any new parts and makes it feel more like mine. I look forward to using the included BL Touch mount on the shroud in the future.