Introduction
My adventure in printing a city continued for quite a while after my previous attempts. After tinkering a lot with temperatures and models, I finally found a good temperature to print at. I switched to using Duramic’s PLA+ White Filament. It was on sale for $24.99 at the time of purchase, not the best price but I wanted something that would work. I found that 205 Celsius on the nozzle and 50 Celsius on the bed worked well. With these settings I was able to print all of the models without any issues.
Oversights
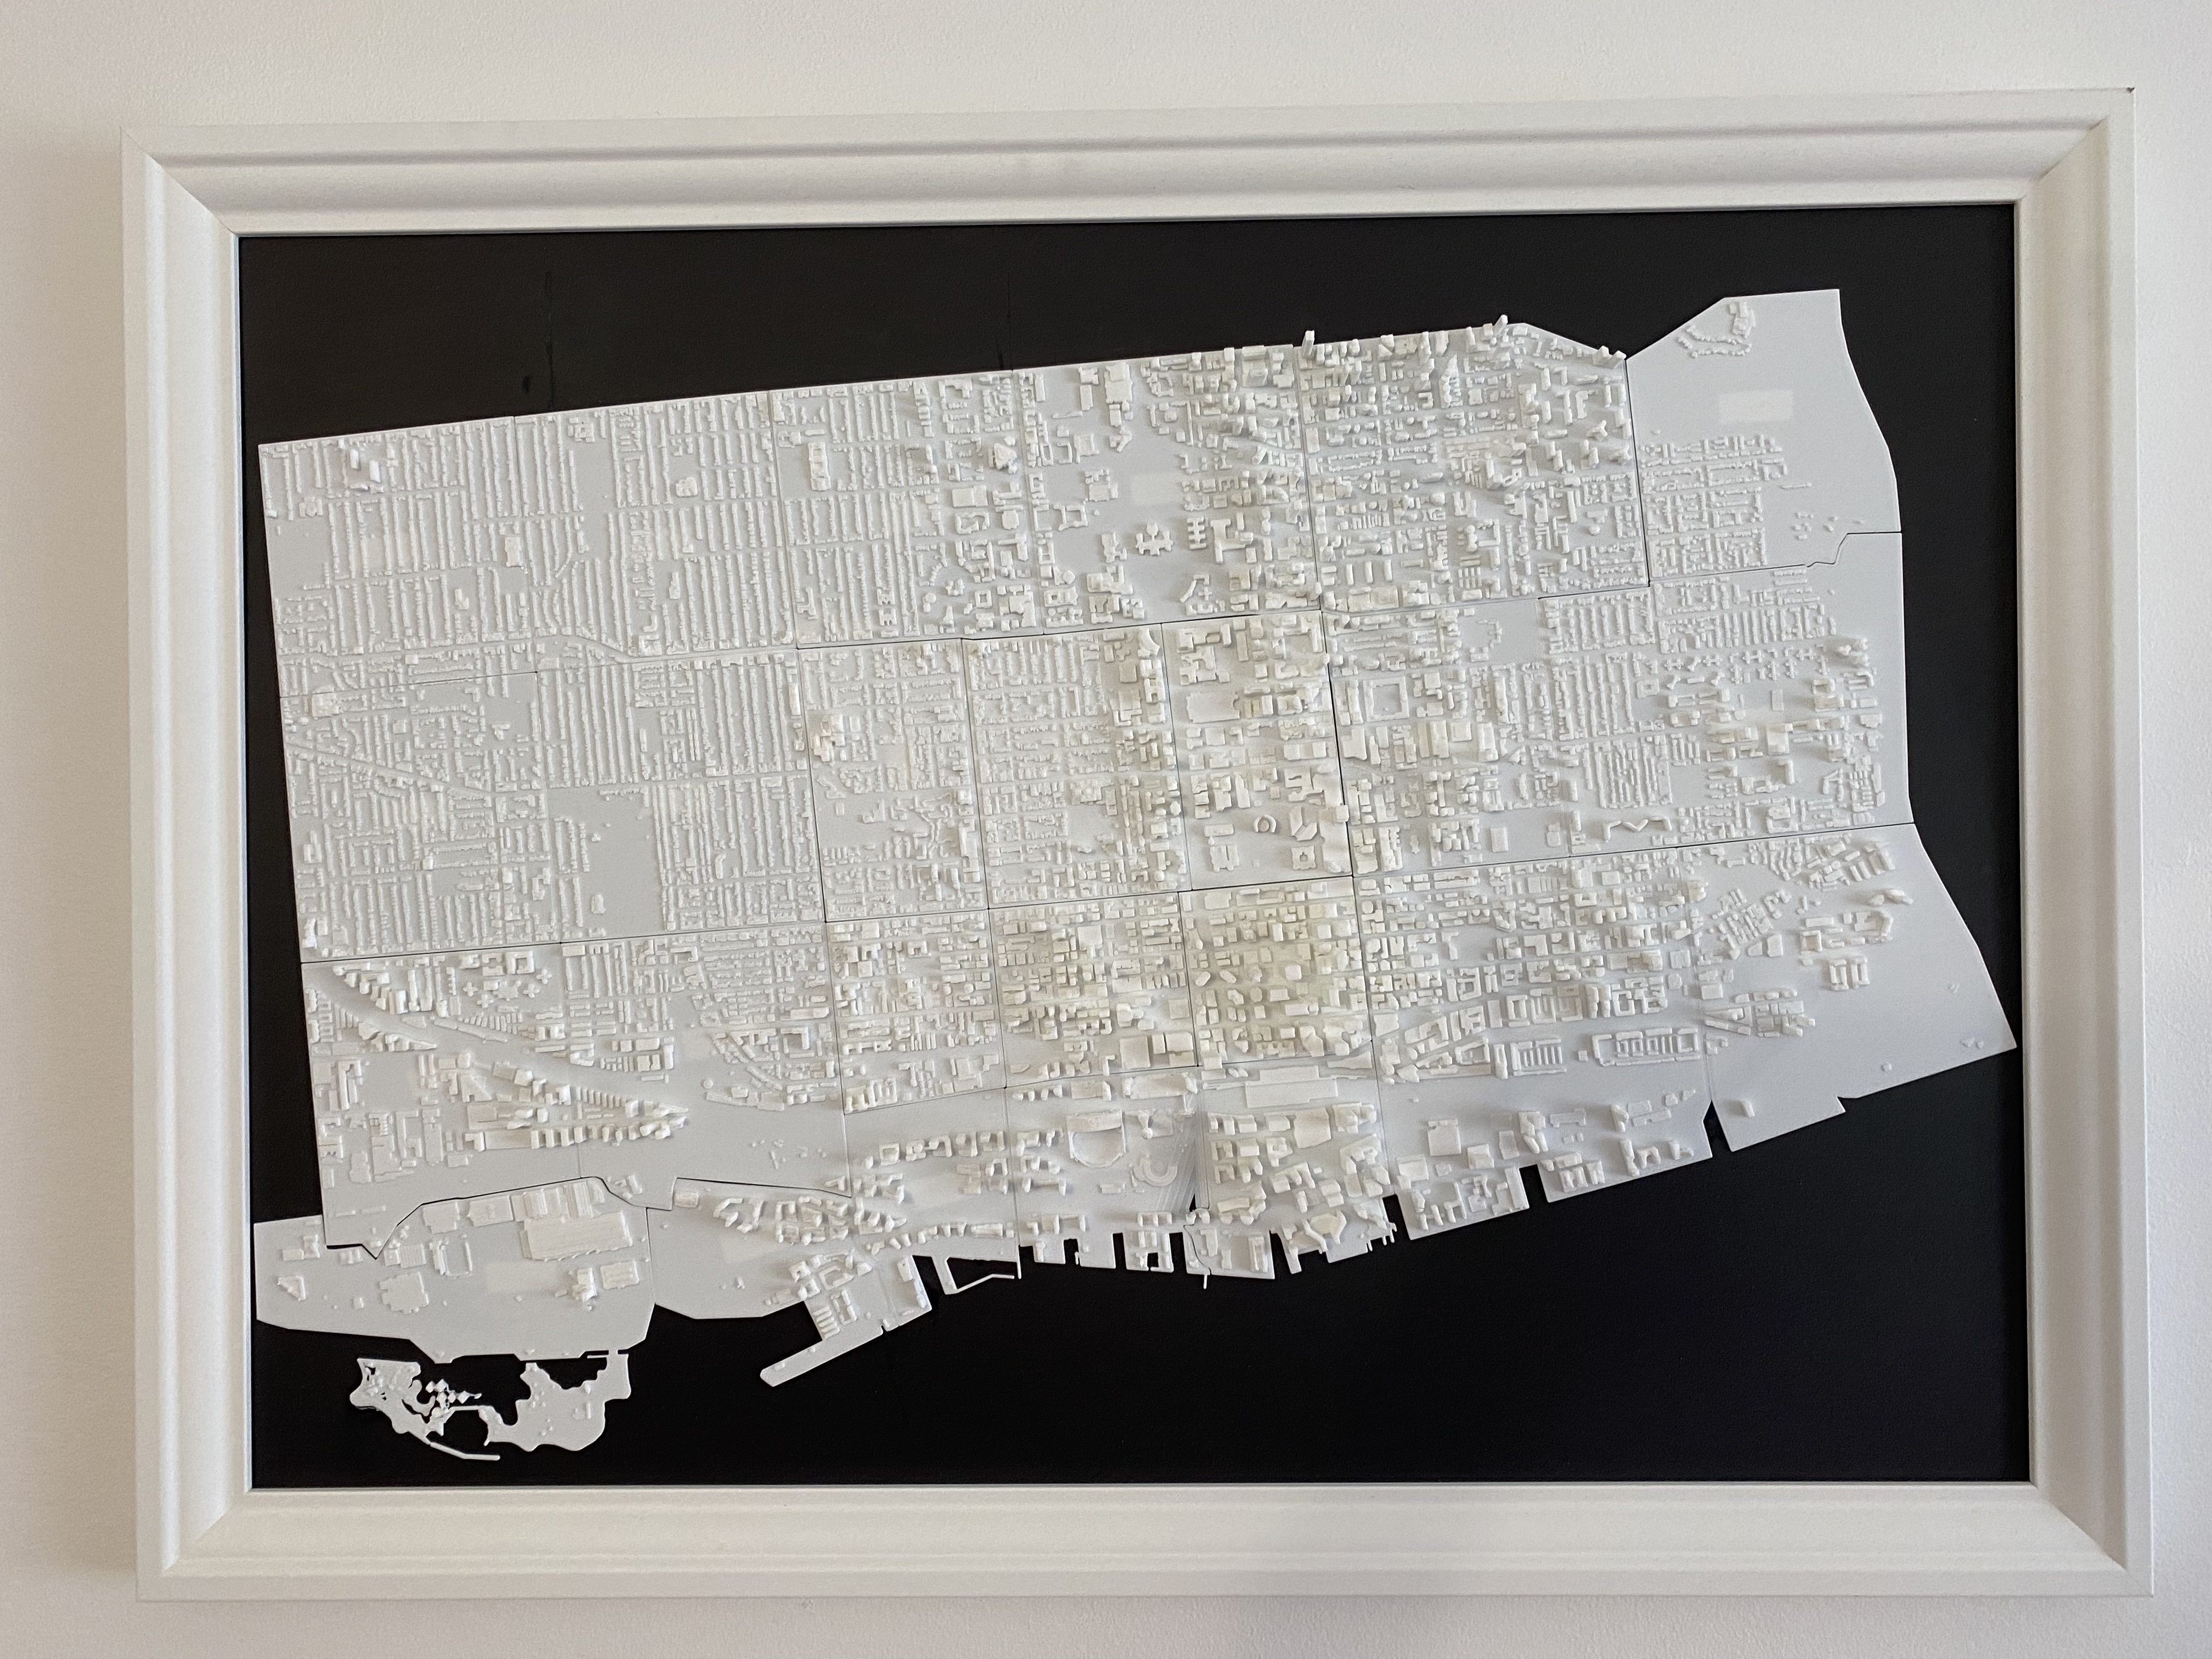
A problem I didn’t expect to run into was the height of the base. In Cura I raised and lowered the model to whatever height looked good, and that worked until I wanted to start connecting the pieces. I settled on five layers for the base, but looking back now I should’ve done much more as it is semi translucent. I also didn’t realize the size of the project, at the scale I was printing at the entirety of Toronto would take up my entire wall. So I decided to focus on printing most of the downtown Toronto area.
Assembly
After all the models were printed, I bought a large black sheet and superglue from Dollarama. The frame I used was the Edsbruk from IKEA, I picked this frame as it was a return that was marked down to half of the original price and cosmetically it looked fine. I cut down the black sheet to fit the frame and started to model out how I’d position the city. Luckily, the frame was just wide enough to fit all of the pieces as long as it was tilted. I glued the edges of the pieces together and then stuck it onto the frame. If I were to do this again, I would just glue them piece by piece as there ended up being quite a few gaps.
Conclusion
Overall, this was a fun project to work on the side and I learned how to convert models from the City of Toronto to a printable STL. There were many hiccups and issues, but in the end I’d say it was worth it and I would definitely do it again.